
By Dennis
Published: April 23, 2009
Trimming the Volvo Fan For The V6 Conversion
Fan Conversion for a V6 Alpine
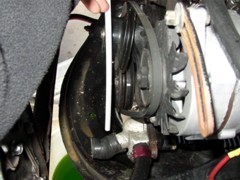
I’ve sold quite a few of the aluminum adapters for mounting the Volvo fans on the Jose V6 conversion. Through some trial an error over the last few years, this application has proven to be a fairly simple, inexpensive and worthwhile solution to overheating experienced by some of us. Each time I sell one of the adapters or adapter fan set ups, I explain to the buyer the process of trimming the blades. So here goes, the parts and process. The parts are shown in the first photo and are, from left to right;
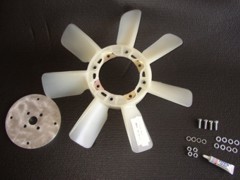
The adapter , which is ¼” aluminum, 5 ¾” in dia. (The holes are drilled to accept the Volvo fan, water pump (WP) pulley (Ford part # DZ4E-8509-AA) and mounting flange. The Volvo fan, Aisin part # 1317465. It comes from a 1976-1982 Volvo 240. Mounting hardware, all grade 8. I use (4) 7mm x 18 mm bolts and nuts. (8) Flat washers and (4) lock washers.
Loctite Threadlocker as an added precaution.
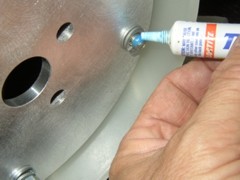
The adapter is attached to the fan mounting ring so it will rest on the “inside”, i.e., on the engine side, while the fan will be on the radiator side of the adapter. Bolt the fan to the adapter in the following order; 1 bolt through 1 flat washer, through the fan mounting ring, through another flat washer, through a lock washer, apply a drop of Loctite to the threads, thread on the nut and then tighten.
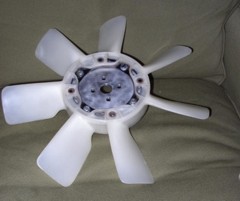

Repeat this step 3 more times until fan/adapter assembly (FA) is complete.
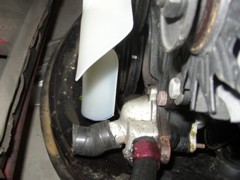
Next, we will go through the steps of trimming the Volvo plastic blades. As all applications may have some subtle nuisances, I do not pre-trim the blades and leave that up to each individual. I highly recommend removing the radiator to make this step easier. Install the FA and the pulley on the car with 2 bolts, finger tight only. DO NOT put the belt on the assembly as you want it to be free turning. In every instance I’ve encountered, the area of the thermostat and lower radiator hose is where you will need to trim the blades for clearance.
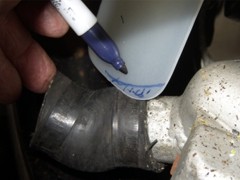
Rotate the fan until one blade hits the hose or thermostat . With a marker shade the area you think needs to be removed in order for the fan to clear.
IMPORTANT: It’s not an absolute critical measurement, as once you have one blade trimmed and it clears, you will be able to have all the other blades the same, therefore, a true spinning fan. However, it’s best to trim not enough the first time, as you can always trim more if you want. You can’t put it back once it’s been trimmed off. Next, remove the FA from the car and cut the shaded area off. I suggest using the stone wheel of a bench grinder, and one with the small little shelf in front of the stone grinding wheel works best . Place the marked blade on the shelf and hold it tightly to prevent vibration when you contact the grinding wheel.
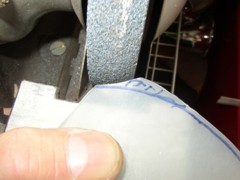
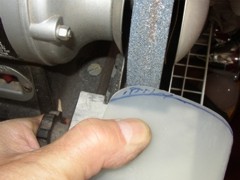
Slowly guide the blade into the wheel and gently grind the marked area off . Reattach the FA and pully again with just 2 bolts, finger tight. Rotate the trimmed blade and if it appears to clear the hose and thermostat, you’re done.
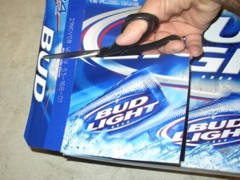
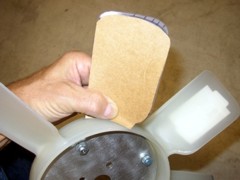
Make sure it clears the hose clamps also. If not, mark the blade and trim again as describes above. Once you are satisfied the trimmed blade is correct, make a template of that blade. To make the template I find the cardboard from an old beer carton (imagine that **hic**) works great. Cut a piece from the carton large enough to cover the blade,
place it behind the trimmed blade and trace the blade,
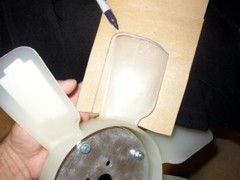
then place the template on untrimmed blades and mark the area above the template to be trimmed
Go back to the grinder and remove all the excess areas. I hand sand each blade end slightly to get rid of burrs and give a more professional finish. Install the FA one more time and spin it. You should not be hitting anything. If it is still hitting something, repeat the above until nothing strikes the blades. Now you can install the FA on your V6 and you’ll have cooler running, guaranteed.